
First of all, to give credit where due, I based my first attempt at picot edging on this website. I made some modifications, mostly to adapt to my own klutziness and inability to join in the round without twisting everything up. So here she goes...
Step One: Crochet chain. I used Cascade 220 left from another project and a big honkin' size J hook to make sure the chain was nice and loose. I chained the 80 stitches I needed, plus six or eight more so I didn't have to deal with the very end stitches. The first stitch or two tend to be tighter and harder to pick up and if I get too cl0se to the last stitch, they start to unravel. My only complaints about the wool is that is splits and grabs making unraveling more difficult (more about that to come). This picture shows the middle loop used to pick up stitches. Along the edge are pairs of stitches kind of like this: (). The "middle loops" are the ones running down the middle (duh!) and offset to the right in this picture.
Step Two: Picking up stitches.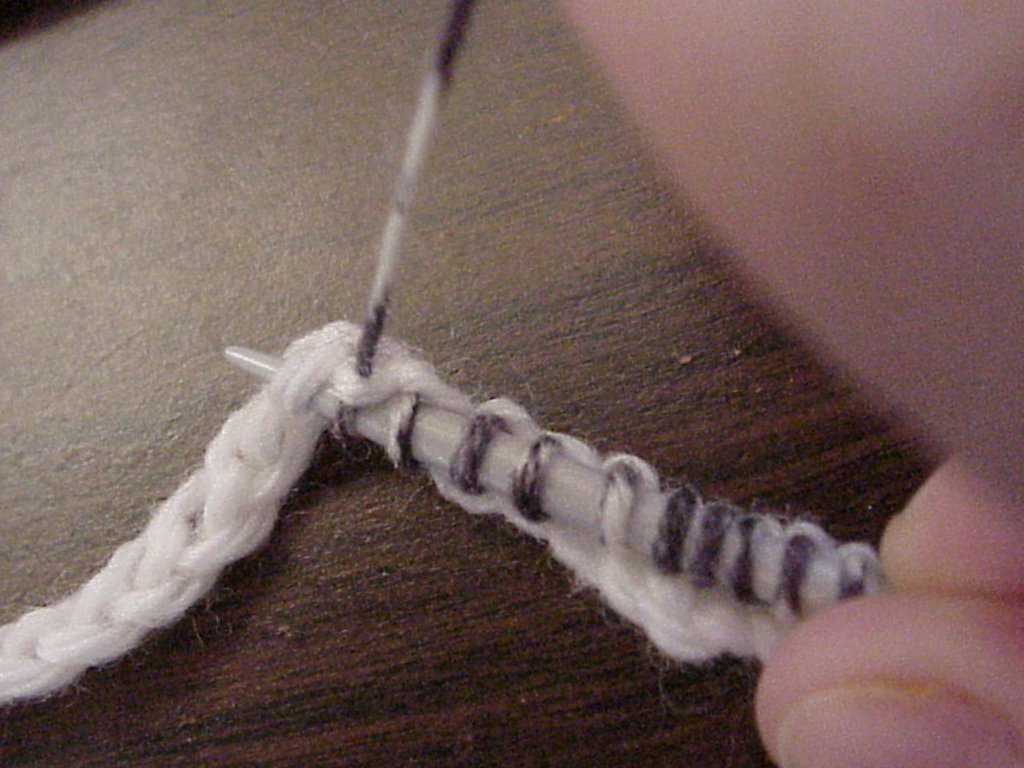 To pick up stitches from the chain, put the tip of the needle through the "middle loop" from bottom to top. (*Picture snapped here*) Then, loop yarn under the needle tip (I do this right-handed), pull the left end of the chain taut with the left hand and pull the loop through just like a knit stitch. Here's the part where I trade efficiency for ease. I used a size 4 straight needle and a second kind of spare yarn (left over from my first pair of socks). For my sock, I picked up 80 stitches.
Step Three: Knit flat for a few rows. I just did simple garter stitch (knit both sides) for three rows. This is to give me something to hold on to when I'm trying to join my circular needles.
Step Four: Real yarn at last!!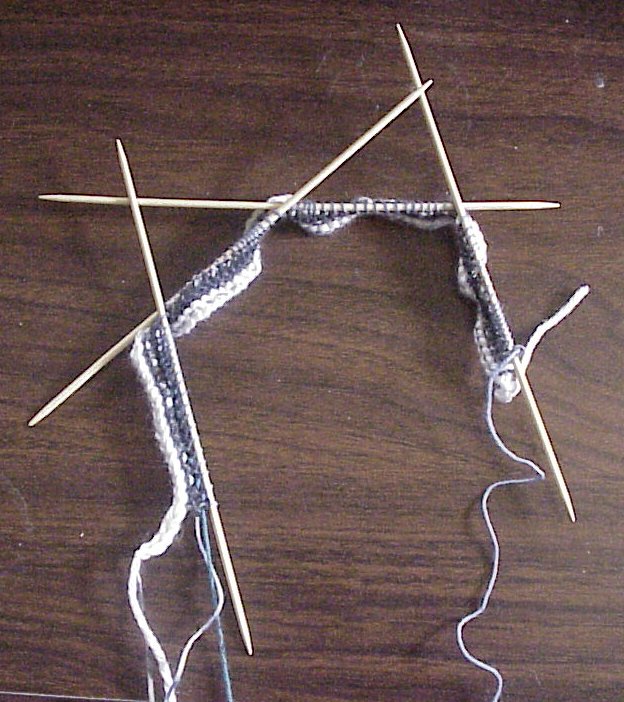 Now I knit one row using the right yarn for the sock and the right sized dpn's. Since I use 5 dpn's, I knit 20 stitches per needle.
Step Five: Join in the round Just a regular join, but the extra edge from the flat knitting gave me something to hold onto, and it was much easier to see whether or not things were getting twisted.
Step Six: After joining knit three rounds in stockinette.
Step Seven: Repeat (yo, k2tog) for one round.
Step Eight: Knit three more rounds in stockinette. Here's the unfolded cuff. Just to make things more confusing I switched to magic loop. The only reason for it was that I am a tense knitter and very hard on small wood or bamboo needles and the size 2 circulars I ordered didn't arrive until after I had started!
Step Nine: Pick up loops at beginning of real yarn. Weave a dpn into the first row of knitting. The stitches are shaped like this: \/. The dpn goes under the / and over the \. I picked up 20 stitches on each dpn this way.
 This picture shows all the stitches picked up. The needles switched because I forgot to use smaller needles to do this when I took the first picture. These are size 00. If you use the same size as you knit with, it is almost impossible to get the ruffles off.
Step Ten: Unravel chain. Pull the end of the chain to unravel stitches. I needed to unloop the yarn from the very first stitch, but after that it went smoothly with two exceptions. First, the wool fibers stick together, so I needed to pick fuzzies to get the unravelling going again every few stitches. Second, I split the yarn when I was picking up stitches in a couple of places. There I had to do some very careful surgery with the scissors to get the chain loose. For future reference: Make the chain out of slippery, non-splitting yarn.
Step Eleven: Unravel other waste yarn.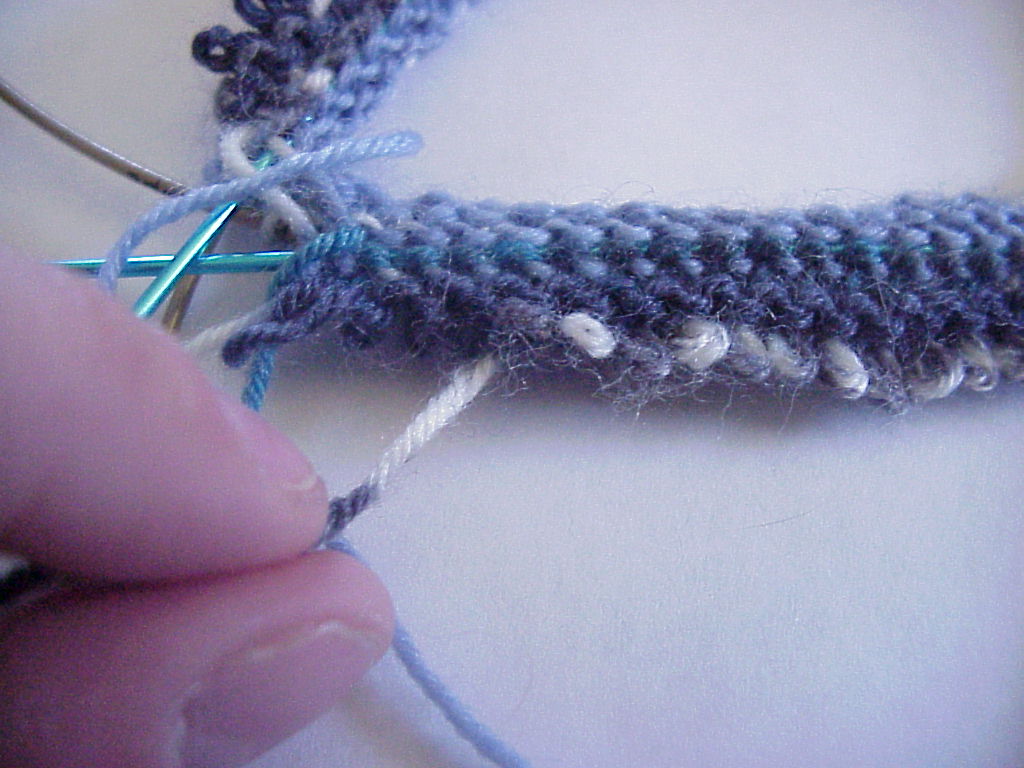 Since it is unravelled from the bottom, the loose end needed to be fed through a loop at the end of the row a couple of times.
Step Twelve: Knit edges together. To do this, I turned the knitting "inside out" so the right (knit) side was on the inside of the circle. Then I could bring the beginning edge up in the back. This part took a little patience and a LOT of fiddling to get the needles where they belonged and overlapped so they would move when they needed to. Then I knit the first stitch of the round since I had a little twisting on the first sock. Then the next 80 stitches were knitting the top and bottom together. The right needle goes through the next stitch in the round knitwise, then through the first loop on the smaller dpn knitwise, so it looks like the picture. Then loop the yarn around like regular knitting and pull the new loop through both the top loop and the bottom loop.
Step Thirteen: Step back and admire your work. The top of the picture shows the right side of the cuff and the bottom shows the inside (you can see the first row of purls. Stand up, take a bow, and then knit stockinette like crazy until it is heel time! Sit back down, too, if it make you more comfortable!
25 May 2006
Picot cuffs
![]()
Subscribe to:
Post Comments (Atom)


0 comments:
Post a Comment