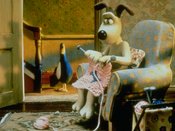
So, I have still been doing a lot of spinning. As we head through July into August, Wisconsin inevitably gets humid with more regularity. When I started spinning, I just kind of draped the roving over my arm and/or shoulder. However, when the humidity went up last year and the roving started sticking to me, I basically put the spinning away until winter. This spring, I started carrying the roving in a plastic grocery bag. I could loop the handles over my arm while I was spinning and just pull out more length as I needed it. Enter this year's increased humidity and one seriously sweaty forearm and/or elbow. So I scratched my head a little. Then I looked at my ball of viscose handspun a bit. I didn't have a project in mind for it, so I scratched my head a little more and cast on for this: Here's what it looks like all stretched out:
 Specifications
Pattern: Made it up as I went
Yarn: Viscose handspun
Needles: KnitPicks Options, size 8
The basic recipe:
Cast on enough stitches to make arm band a nice width (this one has 21)
Knit a few rows (I did 7).
Cast off 3-5 center stitches. Next row cast those stitches back on (leaving a slit between rows).
Knit until it's about wrist sized.
Next two rows: cast off edge stitches to leave a few stitches in the center (this one has 5)
Knit I-cord until it's long enough to fit a slip knot and a big bunch of roving.
The arm band could be anything from garter stitch all the way to as fancy as possible. I did a seed stitch border with a cable down the center: More posts coming soon...In addition to our typical out and about summer schedule, I have also been doing more work getting the apartment ready to start moving, so blogging time gets preempted. I suspect that until we get quasi-settle in the new apartment, the blogging will look like this: long silence, then several posts in a day or two. I am planning on breaking things up into several short(ish) posts all at once rather than trying to cover everything in one monster post, so I don't wind up with a series of novellas with every label I have ever used attached to each.
24 July 2008
FO: Arm Distaff Thingy
02 January 2008
FO: Medieval Treasure
 Specifications
Yarn: Lion Brand Lion Suede (Ebony)
Needles: Denise Interchangeables, Size 9 (I think)
Pattern: Winged it (Wung it?). It went something like this:
CO 48 st Join in the round.
Round 1-3: * K1P1; repeat from *
Round 4: Knit
Round 5: * K2, yo, ssk; repeat from *
Round 6 to running short on yarn: Knit
Decrease K6, K2tog first round, K5, K2tog for second round, etc. until out of yarn. Run tail through remaining stitches and pull tight.
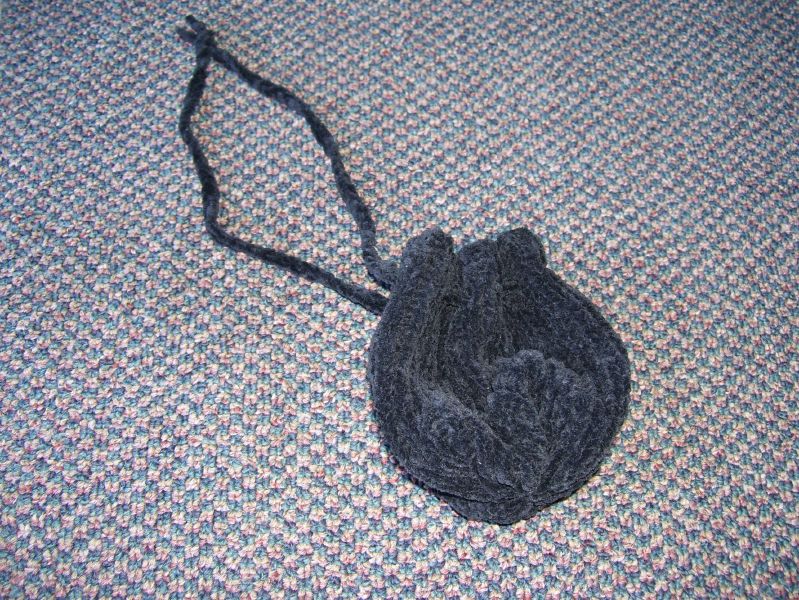
Verdict: Meh. But good for using up spare yarn from Knight's armor. Specifications
Yarn: Lion Brand Glitterspun (Silver, Gold)
Hook: Boye, Size G
Pattern: Crocheted disk from here.
Verdict: Crochet is still not my forte, but after finding this in Ravelry, I figured I had better get over my crochet block. Even though the pattern calls for single crochet, some of them are a completely made-up stitch that vaguely resembles a half double. I'm calling this a FO even though I still have lots of silver and gold yarn and will probably continue to turn out the odd coin or two as the urge hits.
27 November 2006
Halloween costumes
I am long overdue on posting this, but...
The kidlings dressed as black cats for Halloween...Black sweatpants, black velour hoodies, and mama knitted ears and tails. Even though I have been slow to blog, they were done and ready for trick or treating at the zoo on 10/21:
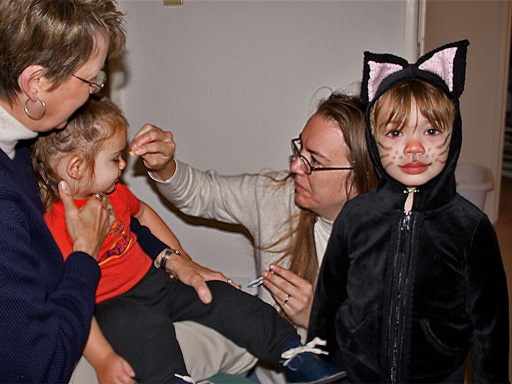 Pretty cute kittens, if I do say so myself!
Here is the ear pattern:
With black yarn (I used Cascade 220), CO 4
Row 1: knit
Row 2 and all even rows: purl
Row 3: k1f&b four times (8 st)
Row 5: (k1f&b, k1) four times (12 st)
Row 7: (k1f&b, k3, k1f&b, k1) twice (14 st)
Row 9: (k1f&b, k5, k1f&b, k1) twice (16 st)
Continue in pattern until ear is desired size. After last increase row, purl one row, knit one row, purl one row. (44 stitches total worked for me)
Base and inner ear.
BO 25 st, k17, BO 2, pull yarn through.
Slide live stitches to other end of circular needle (or slip all purlwise to another straight needle)
Note that front of inner ear is back of main ear
With pink yarn (I used Bernat CottonTots):
Row 1: knit (knit side of black is facing)
Row 2: ssk, knit to last two stitches, k2tog (purl side of black is facing)
Row 3: purl
Repeat rows 2 and 3 until two stitches remain
Last row: k2tog, pull yarn through
It looks something like this: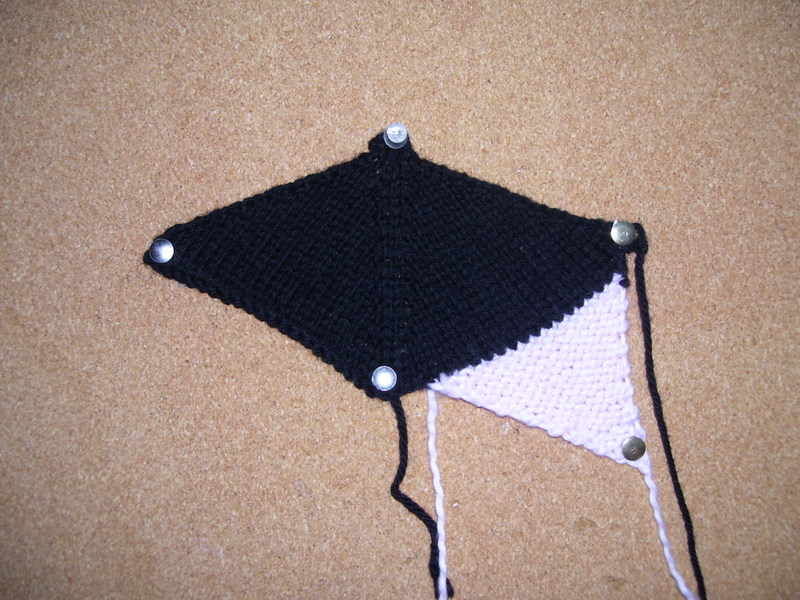 Then I used the tails to sew up the ears so they looked like this:
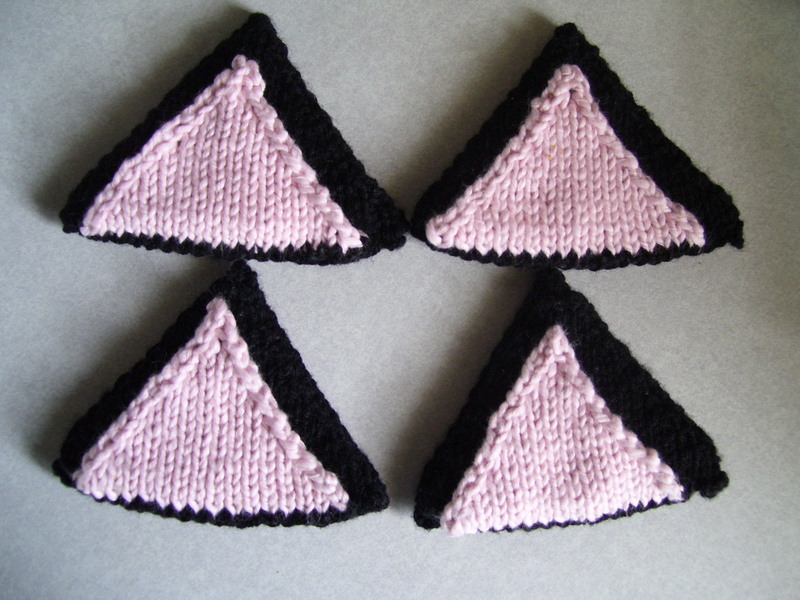 For the tails, I just did a long skinny stockinette swatch with a fuzzy black boucle yarn:
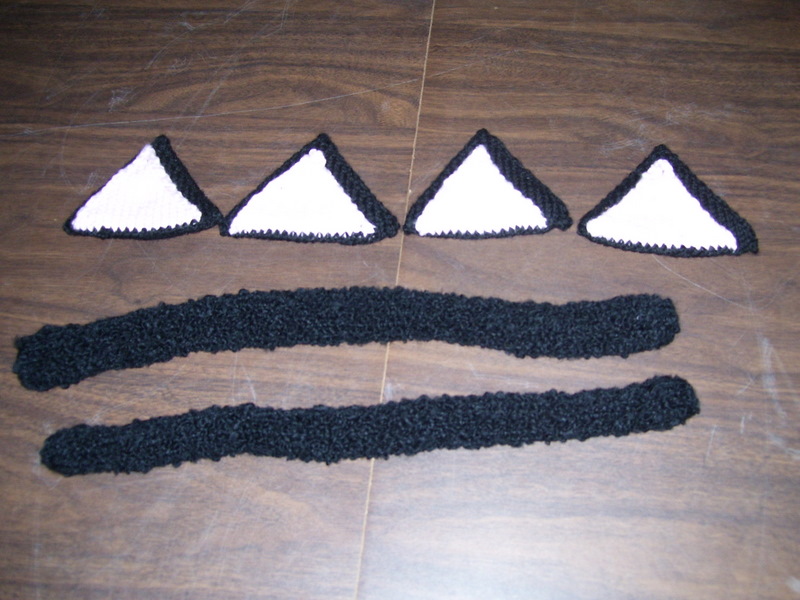
24 July 2006
Twisted Rib for a soaker

Since I always end up with ugly ribbing and still have to put eyelets and i-cord to keep the soaker on, I decided to try something different. I had seen something about knitting through the back loop to get a neater looking rib, but I didn't have access to the computer when I was ready to start the ribbing. I couldn't remember if I was supposed to use the back loop for the knit stitches, the purl stitches or all stitches, so I experimented a little and decided to go with all stitches. I like the way it looks, but I think the next time I will try just the knit stitches.
I had to monkey around a bit to get the eyelets to look right. I put an eyelet in a purl column so it kind of blends in. The normal eyelet is:
- Just before eyelet: k, p, k
- Row 1: k, yo, k2tog (the instruction I used say to use a double yo, but I find that too loose)
- Row 2: k, p into yo, k
- Row 3: k, p into yo in row below, k
- Just before eyelet: k tbl, p tbl, k tbl
- Row 1: k tbl, slip stitch as if to p tbl (two times), slip the two stitches back to L needle, k2tog
- Row 2: k tbl, p into yo normally, k tbl
- Row 3: k tbl, p into yo in row below normally, k tbl
02 June 2006
Pebbles hairdo
 Any Flinstones fans? Bean doesn't like sitting still to have her hair brushed or styled, so the easiest way to get it out of her eyes is a topknot. One evening when we were running errands a sales clerk commented that this hairdo made her look like Pebbles...she just needed a bone. What, to any normal person would be an idle comment, to a crafty mama became a challenge and the Pebbles barrette was born.
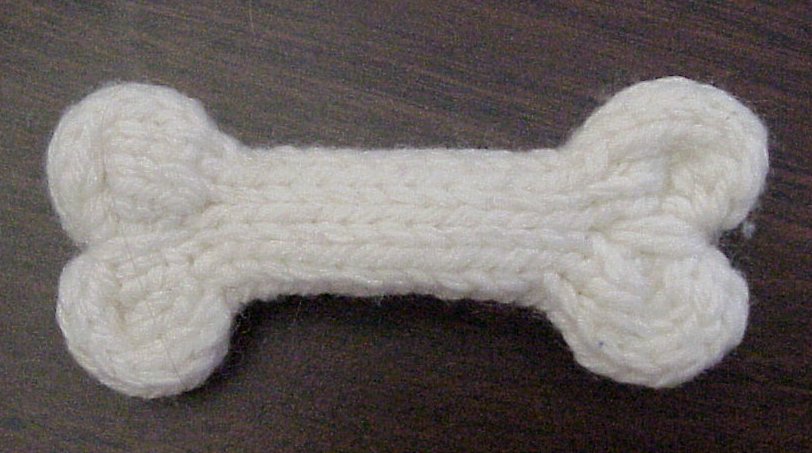 I made it out of leftover Cascade 220, and even though I made it back in April, didn't take notes, and don't remember exactly, it went something like this:
- CO 16 st on dpn
- Join and knit 8 (give or take) rounds
- Decrease round: k2tog 8 times (8 st)
- Knit rounds until long enough to fit on flat barrette (16 or so?)
- Increase round: k1f&b 8 times (16 st)
- Knit same number of rounds as at beginning
 Repeat with CO tail using running stitch around CO stitches to close end. Stitch on to flat barrette with yarn.
25 May 2006
Picot cuffs
First of all, to give credit where due, I based my first attempt at picot edging on this website. I made some modifications, mostly to adapt to my own klutziness and inability to join in the round without twisting everything up. So here she goes...
Step One: Crochet chain. I used Cascade 220 left from another project and a big honkin' size J hook to make sure the chain was nice and loose. I chained the 80 stitches I needed, plus six or eight more so I didn't have to deal with the very end stitches. The first stitch or two tend to be tighter and harder to pick up and if I get too cl0se to the last stitch, they start to unravel. My only complaints about the wool is that is splits and grabs making unraveling more difficult (more about that to come). This picture shows the middle loop used to pick up stitches. Along the edge are pairs of stitches kind of like this: (). The "middle loops" are the ones running down the middle (duh!) and offset to the right in this picture.
Step Two: Picking up stitches.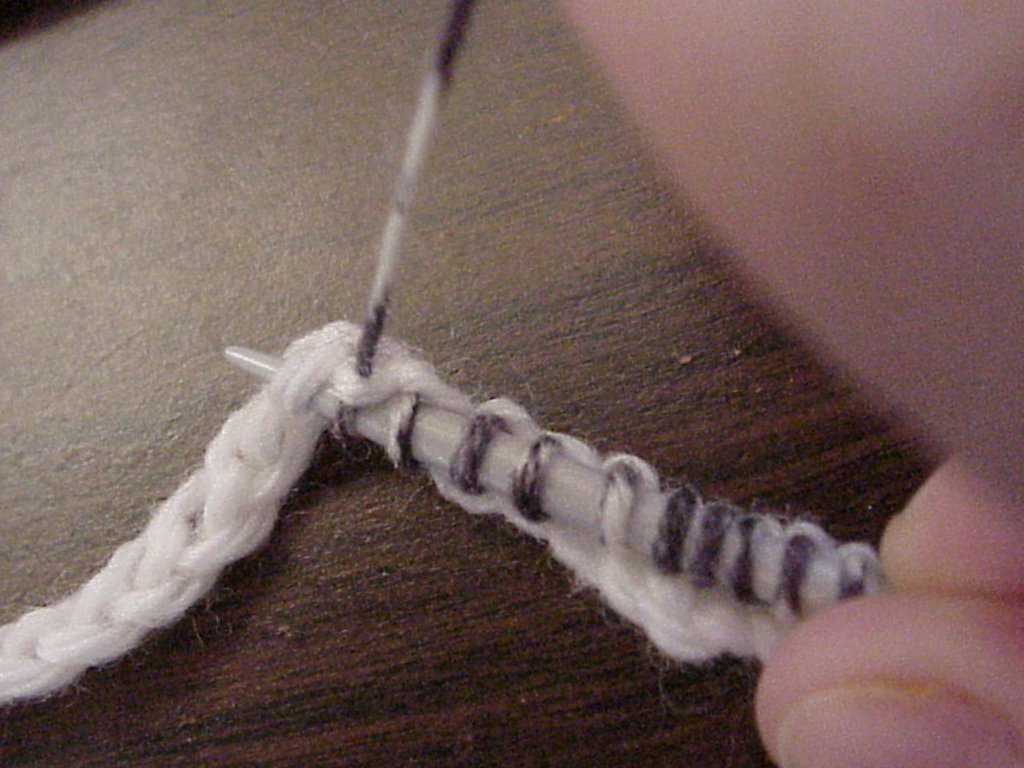 To pick up stitches from the chain, put the tip of the needle through the "middle loop" from bottom to top. (*Picture snapped here*) Then, loop yarn under the needle tip (I do this right-handed), pull the left end of the chain taut with the left hand and pull the loop through just like a knit stitch. Here's the part where I trade efficiency for ease. I used a size 4 straight needle and a second kind of spare yarn (left over from my first pair of socks). For my sock, I picked up 80 stitches.
Step Three: Knit flat for a few rows. I just did simple garter stitch (knit both sides) for three rows. This is to give me something to hold on to when I'm trying to join my circular needles.
Step Four: Real yarn at last!!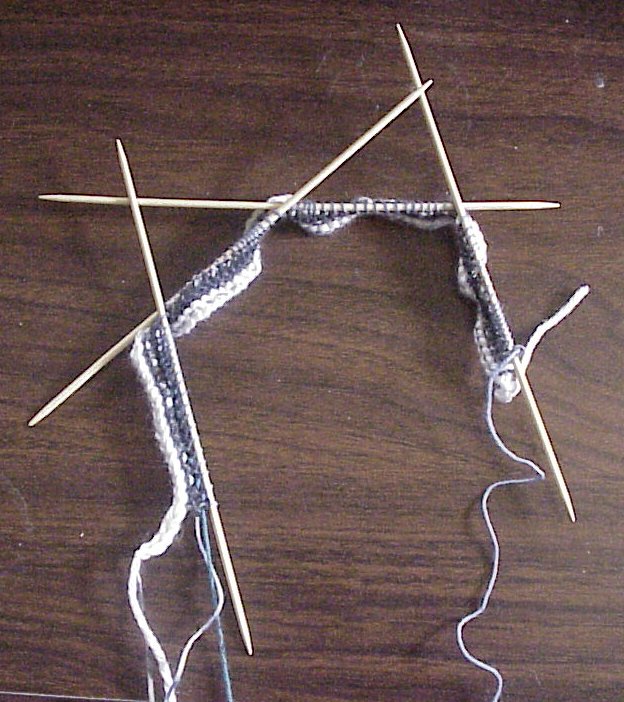 Now I knit one row using the right yarn for the sock and the right sized dpn's. Since I use 5 dpn's, I knit 20 stitches per needle.
Step Five: Join in the round Just a regular join, but the extra edge from the flat knitting gave me something to hold onto, and it was much easier to see whether or not things were getting twisted.
Step Six: After joining knit three rounds in stockinette.
Step Seven: Repeat (yo, k2tog) for one round.
Step Eight: Knit three more rounds in stockinette. Here's the unfolded cuff. Just to make things more confusing I switched to magic loop. The only reason for it was that I am a tense knitter and very hard on small wood or bamboo needles and the size 2 circulars I ordered didn't arrive until after I had started!
Step Nine: Pick up loops at beginning of real yarn. Weave a dpn into the first row of knitting. The stitches are shaped like this: \/. The dpn goes under the / and over the \. I picked up 20 stitches on each dpn this way.
 This picture shows all the stitches picked up. The needles switched because I forgot to use smaller needles to do this when I took the first picture. These are size 00. If you use the same size as you knit with, it is almost impossible to get the ruffles off.
Step Ten: Unravel chain. Pull the end of the chain to unravel stitches. I needed to unloop the yarn from the very first stitch, but after that it went smoothly with two exceptions. First, the wool fibers stick together, so I needed to pick fuzzies to get the unravelling going again every few stitches. Second, I split the yarn when I was picking up stitches in a couple of places. There I had to do some very careful surgery with the scissors to get the chain loose. For future reference: Make the chain out of slippery, non-splitting yarn.
Step Eleven: Unravel other waste yarn.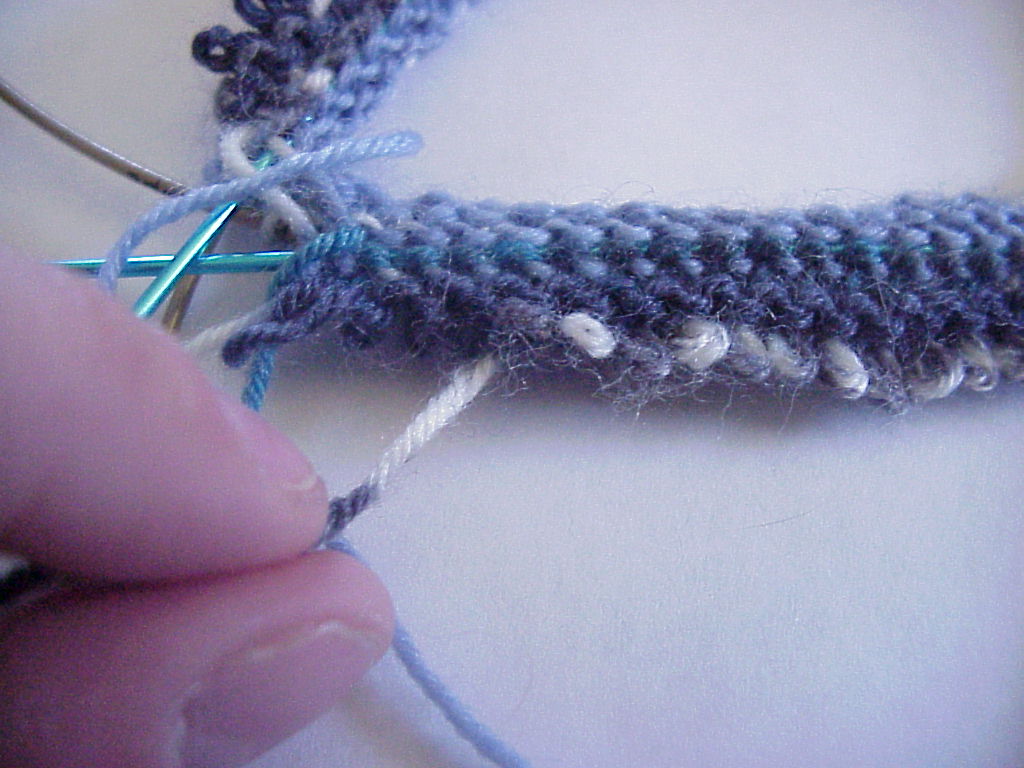 Since it is unravelled from the bottom, the loose end needed to be fed through a loop at the end of the row a couple of times.
Step Twelve: Knit edges together. To do this, I turned the knitting "inside out" so the right (knit) side was on the inside of the circle. Then I could bring the beginning edge up in the back. This part took a little patience and a LOT of fiddling to get the needles where they belonged and overlapped so they would move when they needed to. Then I knit the first stitch of the round since I had a little twisting on the first sock. Then the next 80 stitches were knitting the top and bottom together. The right needle goes through the next stitch in the round knitwise, then through the first loop on the smaller dpn knitwise, so it looks like the picture. Then loop the yarn around like regular knitting and pull the new loop through both the top loop and the bottom loop.
Step Thirteen: Step back and admire your work. The top of the picture shows the right side of the cuff and the bottom shows the inside (you can see the first row of purls. Stand up, take a bow, and then knit stockinette like crazy until it is heel time! Sit back down, too, if it make you more comfortable!
18 May 2006
Diaper Wipes
Yeah, they are kind of fancy for wiping poopy butts, but I'm using up some cotton yarn and trying out some things.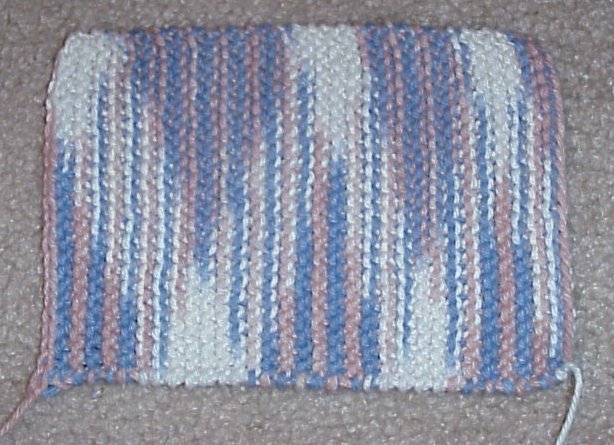 Wipe #1: Nothing too fancy...garter stitch with verigated yarn.
 Wipe #2: Kind of a funky ripple things with plain yarn. To make it: CO 29
Row 1: S1 knitwise, k1, k2tog, k4, (k1, yo, k1) double increase, k4, (slip 2 as if to knit, k1, psso) double decrease, k4, (k1, yo, k1) double increase, k4, ssk, k1
Row 2: S1 knitwise, p to last stitch, k1
Repeat rows 1 and 2, CO on an even row.
Hmmmm...when you turn it the way it was knitted, thusly: This would be just gorgeous as a center panel in a tank top or a short-sleeved summer sweater with the funky zig-zaggy edge at the neckline and bottom hem. Hmmmmmm...
Okay, I lied...cast on edge is on the top. But I definitely like the "W" shape better than the "M" shape. I'm thinking: knit from the top down? Or maybe reverse increases and decreases (yo at each edge, double increase at center, two double decreases between)? Ooo, oo, oo, I feel another wipe coming on!!